

SVG 从入门到开发一个简单的渲染引擎
date
Sep 24, 2021
slug
svg_guide
status
Published
tags
SVG
type
Post
URL
summary
Author
在前端可视化领域,Web 图形一般都是通过浏览器绘制的,而现代浏览器绘制图形大概有五种方式。第一种就是 HTML + CSS;第二种是 SVG;第三种是 Canvas2D;第四种是 WebGL;第五种是 WebGPU。
第一种方式平常大家写网页可能都比较熟悉,所以不做多介绍,就从第二种方式 SVG 开始学习吧,后面几种方式后续也会分享。
SVG 介绍
SVG 又称可缩放矢量图形(Scalable Vector Graphics), SVG 就是一个图片文件。我们可以像使用PNG 或JPEG 等图片文件一样使用它,可以在可视化编辑器中创建和编辑 SVG,也可以将其作为图片嵌入到网页中。我们很多开发者可能对 SVG 作为图片格式使用比较熟悉一点。
但是 SVG 又不仅仅是图片,它是包含标记元素、文本、样式指令的结构化文档,一种基于 XML 的标记语言。在浏览器里可以直接内嵌 SVG 标签,可以像操作 HTML 元素一样利用 DOM API 操作 SVG 元素,我们可以动态的在网页里绘制 SVG 图形和动效。
API 速览
标签
SVG 元素的渲染顺序——SVG文件全局有效的规则是“后来居上”,越后面的元素越可见。推荐的写法:
<svg version="1.1"
     baseProfile="full"
     width="300" height="200"
     xmlns="http://www.w3.org/2000/svg">
  <rect width="100%" height="100%" fill="red" />
  <circle cx="150" cy="100" r="80" fill="green" />
  <text x="150" y="125" font-size="60" text-anchor="middle" fill="white">SVG</text>
</svg>
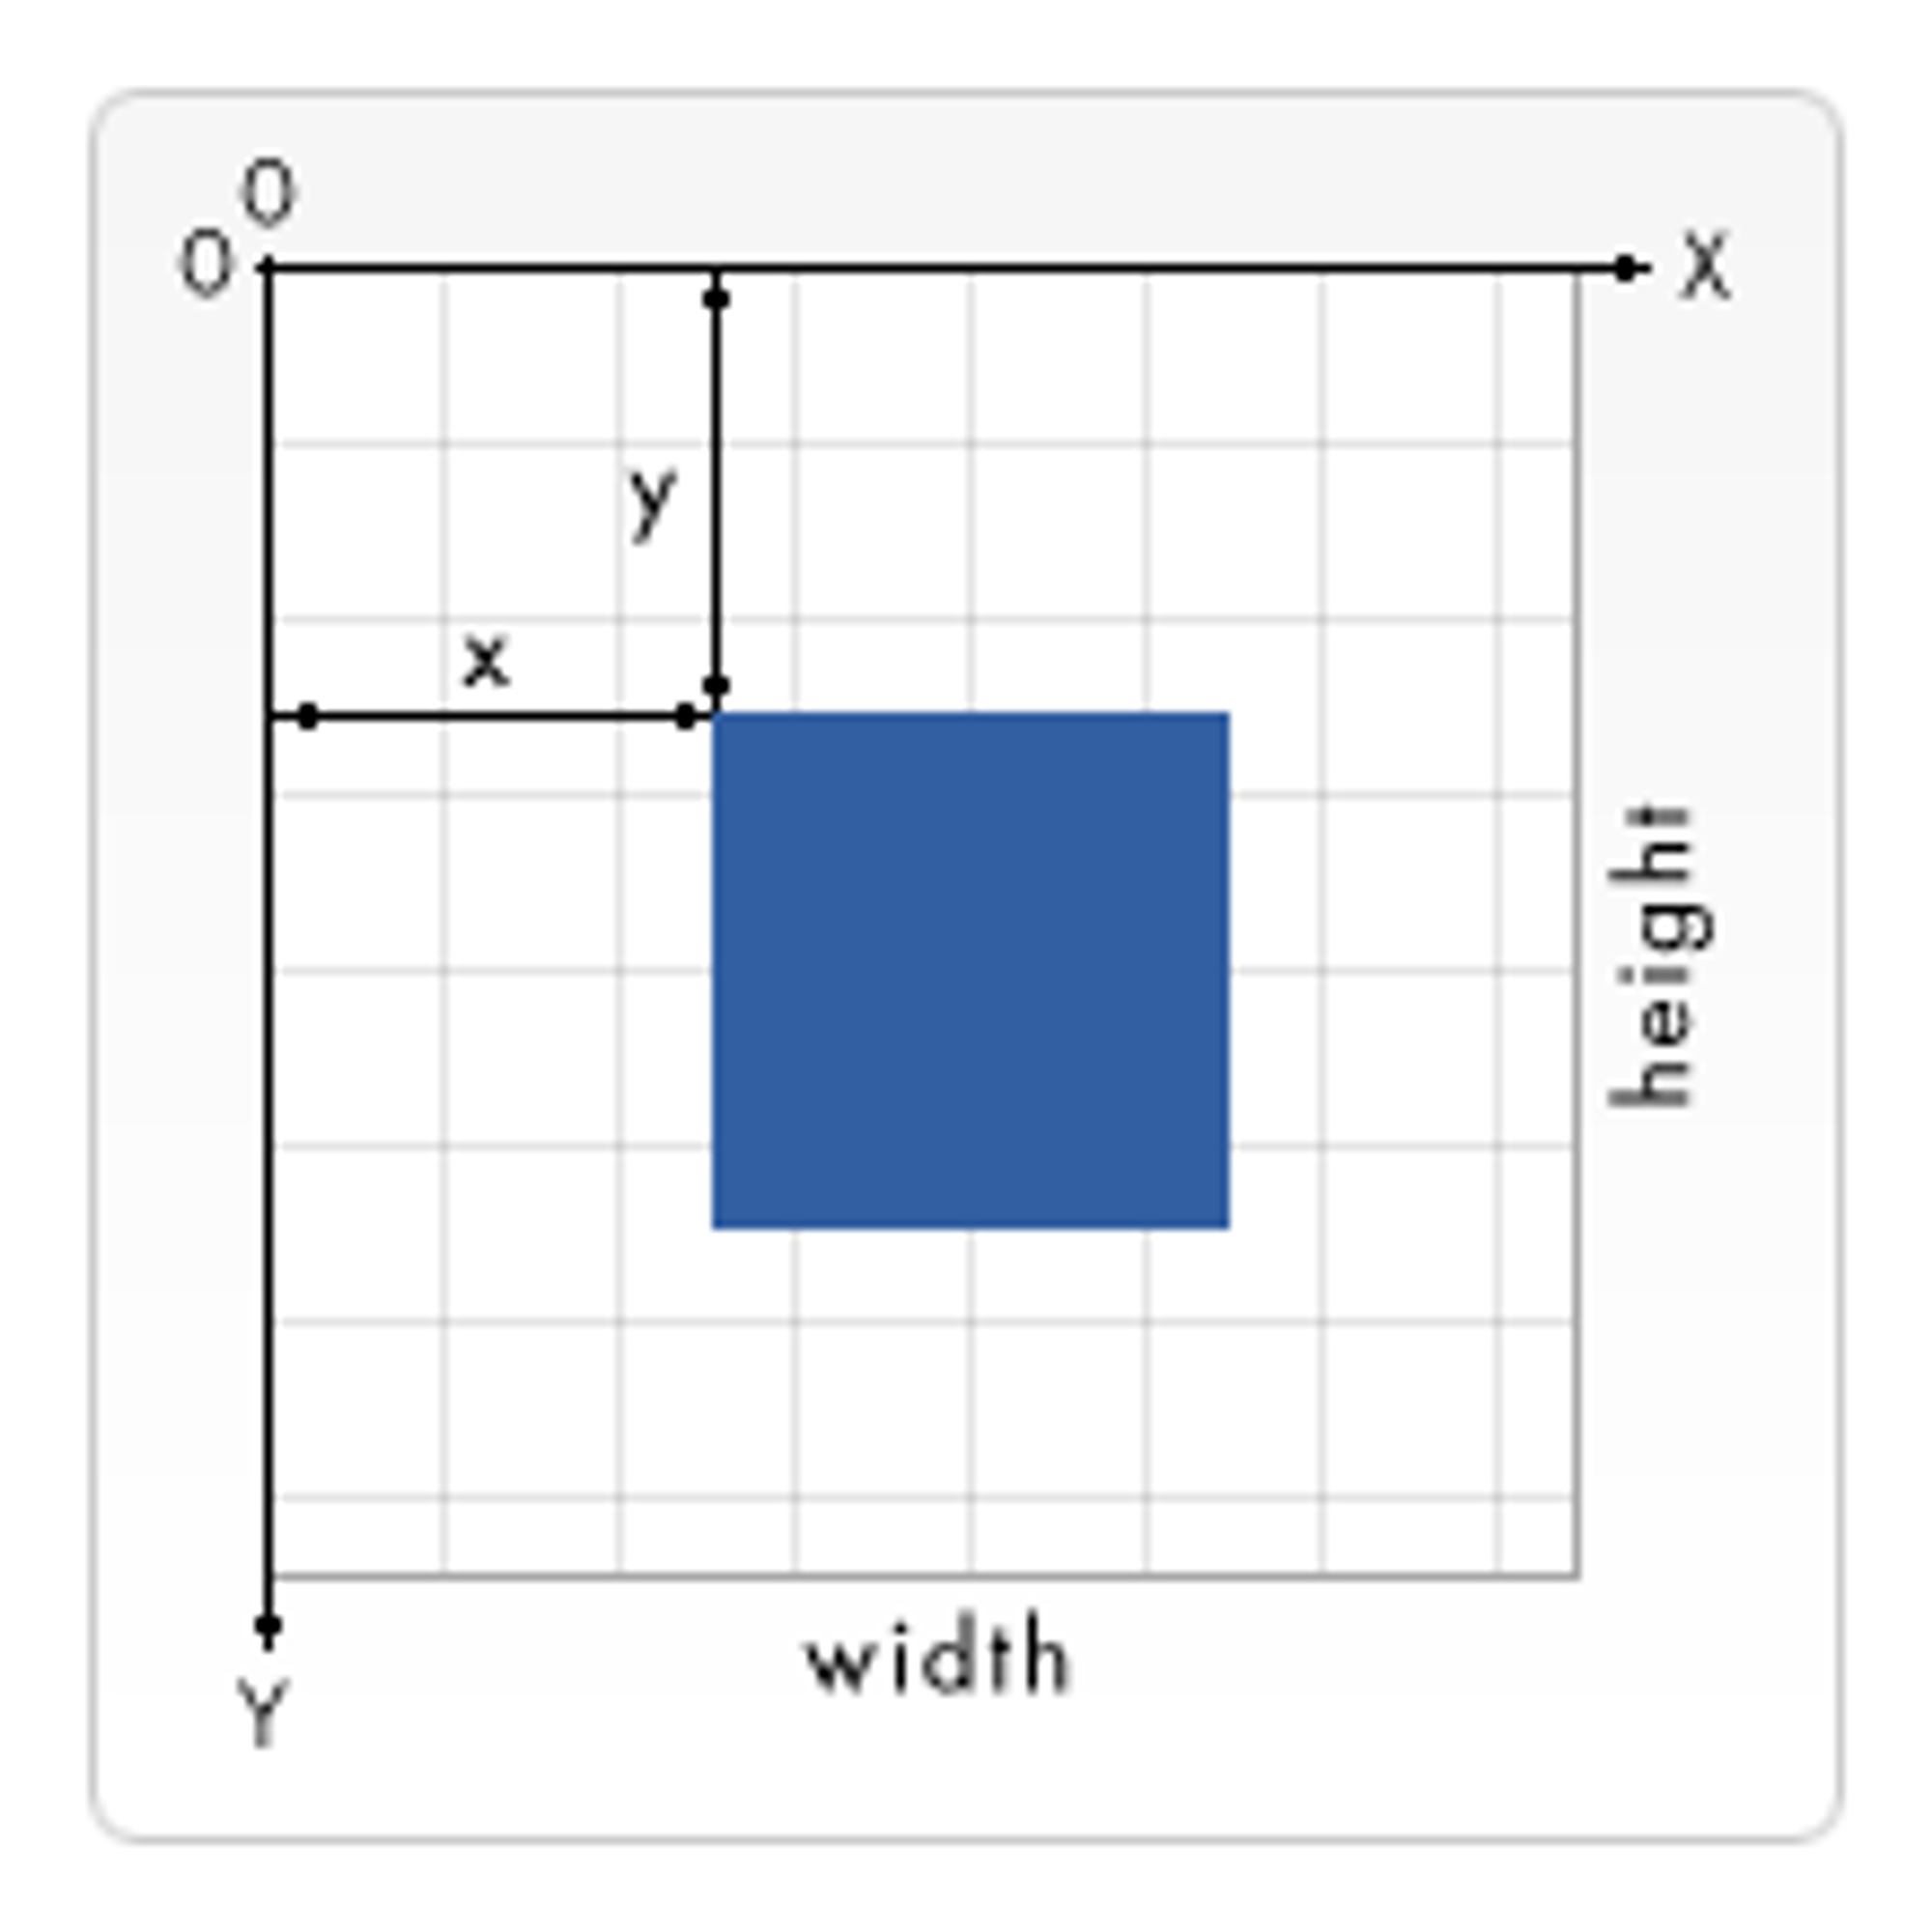
坐标定位
以页面的左上角为(0,0)坐标点,坐标以像素为单位,x轴正方向是向右,y轴正方向是向下。
基本形状
rect:矩形
circle:圆形
ellipse:椭圆
line:线条
polyline:折线
polygon:多边形
path: 路径
变换
svg 的 transform 支持平移(
translate)、旋转(rotate)、斜切(skewX skewY)、缩放(scale)等变形效果。滤镜
滤镜是 SVG 中用于创建复杂效果的一种机制。滤镜通过
<filter> 元素进行定义,并且置于 <defs> 区块中。在 filter 标签中提供一系列图元(primitives),以及在前一个基本变换操作上建立的另一个操作(比如添加模糊后又添加明亮效果)。如果要应用所创建的滤镜效果,只需要为 SVG 图形元素设置 filter 属性即可。渐变
有两种类型的渐变:线性渐变(
linearGradient)和径向渐变(radialGradient)。你必须给渐变内容指定一个id属性,否则文档内的其他元素就不能引用它。为了让渐变能被重复使用,渐变内容需要定义在<defs>标签内部,而不是定义在形状上面。我们简单的熟悉一些常用的 API 就可以了,更多的 SVG 属性可以参考 MDN 上的文档 https://developer.mozilla.org/zh-CN/docs/Web/SVG
渲染引擎实战
现在社区比较流行的一些可视化图表库,他们的技术架构里,底层都有一个渲染引擎库,比如 Echart 底层依赖的 zrender,@antv/G2底层依赖的 @antv/G等。这些图表引擎库基本都支持 SVG 和 Canvas2D 实现,有的还支持了 WebGL。
为什么大家都需要封装一个渲染引擎,个人觉得主要是因为使用渲染引擎能够更轻松的绘制并管理图形元素,提供完善的动画与事件机制,实现多种渲染方式可以在多个渲染器之间任意切换等。本质其实我们平常用的那些框架一样,因为原生的方式不好用,用起来不方便等因素。
熟悉一个技术最好的方式就是自己也去实现一遍,我们平常用了这么多图表库,只是熟悉使用他们提供的 API,其实我们自己也可以实现一个简单的图表库,就从渲染引擎实现开始吧。
写代码之前我们先把功能和 API 设计一下,我们的 SVG 渲染引擎只需要支持简单的图形绘制,坐标系变换和一些滤镜渐变效果就可以。
import { createRenderer } from 'xsvg';

// 创建渲染器
const renderer = createRenderer(100, 100);

// 坐标变换
renderer.translate(200, 100);

// 绘制基本图形-矩形
const a = renderer.rect({
  x: 10,
  y: 10,
  width: 50,
  height: 50,
  fill: 'red',
});
// 添加滤镜
renderer.filter(a, [{ name: 'sepia', params:[{ unit: '', value: 2}] }, { name: 'blur', params:[{ unit: '', value: 15}] }, { name: 'dropShadow', params: [{ unit: '', value: 0.8 }, { unit: '', value: 8 }, { unit: '', value: 10 }, {  formatted: 'red' }]}])

// 添加渐变效果
renderer.gradient(a, { type: 'line', stops: [{offset: '0%', stopColor: 'red'}, {offset: '50%', stopColor: 'black', stopOpacity: 0}, {offset: '100%', stopColor: 'blue'}]})
功能和 API 都很简单,使用也很简单。毕竟我们只是为了自己学习使用,但其实对实现一些简单的图表够用了。下面开始对前面的 API都一一实现。
通用工具
export function createSVGElement(type: string) {
  return document.createElementNS('http://www.w3.org/2000/svg', type);
}

// 将 child 节点挂载到 parent 节点上面
export function mount(parent: SVGElement, child: SVGElement) {
  if (parent) {
    parent.appendChild(child);
  }
}
创建渲染器
export function createRenderer(width: number, height: number) {
  const context = createContext(width, height);
  return {
    line: (options: LineAttr) => line(context, options),
    circle: (options: CircleAttr) => circle(context, options),
    text: (options: TextOptions) => text(context, options),
    rect: (options: RectAttr) => rect(context, options),
    path: (options: PathAttr) => path(context, options),
    ring: (options: RinOptions) => ring(context, options),
    ellipse: (options:SVGAttributes<any>) => ellipse(context, options),
    restore: () => restore(context),
    save: () => save(context),
    scale: (x:number | string , y: number | string) => scale(context, x, y),
    rotate: (theta: number | string) => rotate(context, theta),
    translate: (x: number | string, y: number | string) => translate(context, x ,y),
    skewX: (x: number) => skewX(context, x),
    skewY: (y: number) => skewY(context, y),
    node: () => context.node,
    group: () => context.group,
    filter: (el:any, params:any[]) => filter(context, el, params),
    gradient: (el:any, params:any) => gradient(context, el, params)
  };
}
创建上下文
import { createSVGElement, mount } from './utils';
let i = 0
export function createContext(width: string, height: string) {
	// 给页面上每个画布一个标识,后面一些 id 设置需要用到
  i++;
  // 创建画布 svg 节点,并且设置宽高
  const svg = createSVGElement('svg');
  svg.setAttribute('width', width);
  svg.setAttribute('height', height);
  svg.setAttribute('viewBox', `0 0 ${width} ${height}`);

  // 创建挂载 g 节点,并且把该 g 节点挂载到 svg 节点上
  const g = createSVGElement('g');
  mount(svg, g);

  // 返回画布节点和挂载节点
  return {
    node: svg,
    group: g,
    idx: i,
  };
}
图形绘制
export function shape(type, context, attributes) {
  const { group } = context; // 挂载元素
  const el = createSVGElement(type); // 创建对应的元素
  applyAttributes(el, attributes); // 设置属性

  mount(group, el); // 挂载
  return el; // 返回该元素

}

export function rect(context: { node: SVGElement | undefined; group: SVGElement; }, attributes: SVGAttributes<any>) {
  const {
    width, height, x, y,
  } = attributes;

  return shape('rect', context, {
    ...attributes,
    width: Math.abs(width),
    height: Math.abs(height),
    x: width > 0 ? x : x + width,
    y: height > 0 ? y : y + height,
  });
}
...
坐标系变换
// 坐标系变换
import { applyTransform, createSVGElement, mount } from './utils';

export function transform(type: string, context: { group: SVGElement; }, ...params: any[]) {
  // type 是希望的变换种类:scale,translate,rotate 等
  const { group } = context;
  applyTransform(group, `${type}(${params.join(', ')})`);
}

// 平移
export function translate(context: { node?: SVGElement; group: SVGElement; }, tx: number | string, ty: number | string) {
  transform('translate', context, tx, ty);
}

// 旋转
export function rotate(context: { node?: SVGElement; group: SVGElement; }, theta: number | string) {
  transform('rotate', context, theta);
}

// 伸缩
export function scale(context: { node?: SVGElement; group: SVGElement; }, sx: number | string, sy?: number | string) {
  transform('scale', context, sx, sy);
}

// 斜切
export function skewX(context: { node?: SVGElement; group: SVGElement; }, X: number) {
  transform('skewX', context, X);
}
// 斜切
export function skewY(context: { node?: SVGElement; group: SVGElement; }, Y: number) {
  transform('skewY', context, Y);
}


export function save(context: { node?: SVGElement; group: SVGElement; }) {
  const { group } = context;
  const newGroup = createSVGElement('g');
  mount(group, newGroup);
  context.group = newGroup;
}


export function restore(context: { node: SVGElement; group: SVGElement; }) {
  const { group } = context;
  const { parentNode } = group;
  if (parentNode) {
    context.group = parentNode as SVGAElement;
  }
}
滤镜
滤镜实现起来有点稍微复杂,主要是他的结构复杂了一点,但是只要思路对了就可以慢慢实现了。
比如我一开始就是先从怎么用原生 JS 实现一个 SVG 滤镜效果动手的:
const container = document.getElementById("svgContainer");
const mySvg = document.createElementNS("http://www.w3.org/2000/svg", "svg");
mySvg.setAttribute("version", "1.1");
container.appendChild(mySvg); // svg

const obj = document.createElementNS("http://www.w3.org/2000/svg", "rect");
obj.setAttribute("width", "90");
obj.setAttribute("height", "90"); // shape

const defs = document.createElementNS("http://www.w3.org/2000/svg", "defs"); //defs

const filter = document.createElementNS("http://www.w3.org/2000/svg", "filter"); // filter
filter.setAttribute("id","f1");
filter.setAttribute("x","0");
filter.setAttribute("y","0");

const gaussianFilter = document.createElementNS("http://www.w3.org/2000/svg", "feGaussianBlur"); // blur
gaussianFilter.setAttribute("in","SourceGraphic");
gaussianFilter.setAttribute("stdDeviation","15");

filter.appendChild(gaussianFilter);
defs.appendChild(filter);

mySvg.appendChild(defs);
obj.setAttribute("filter","url(#f1)");

mySvg.appendChild(obj);
从上面的实现我们可以分析得到当有滤镜效果的时候,SVG 画布的 DOM 结构层次大概是这样的:
svg -> rect(shape) | defs -> filter -> blur
我们只要分别实现这些元素,然后把对应的元素插入到相应的位置即可,需要注意的地方是 filter id 不能重复。这里就利用了前面渲染器生成的 idx。
/* eslint-disable @typescript-eslint/ban-ts-comment */
/* eslint-disable @typescript-eslint/no-use-before-define */
import { applyAttributes, convertAngleUnit, convertToAbsoluteValue, createFeColorMatrix, createFeComponentTransfer, createSVGElement, mount } from "./utils";

export type LengthUnit = 'px' | '%';
export type AngleUnit = 'deg' | 'rad' | 'turn';
export type Unit = LengthUnit | AngleUnit | '';
export interface ParsedElement {
  unit: Unit;
  value: number;
}

const FILTER_PREFIX = 'g-filter-';


const filterMap: Record<string, (f:any, p:any) => void> = {
  blur,
  brightness,
  dropShadow,
  grayscale,
  contrast,
  sepia,
  saturate,
  hueRotate,
  invert,
};


/**
 * 滤镜
 * filter 渲染: svg -> rect(shape) | defs -> filter -> blur
 *
 * @param context
 * @param filters
 */

export function filter(context: any, el:any, filters:any[]) {
  const { group, node, idx } = context; // 挂载元素  svg

  const $def = createSVGElement('defs') as SVGDefsElement; // defs

  const filterIds = filters.map(({ name, params }: {name: any, params: any}, i: number) => {
    const filterName = `${FILTER_PREFIX}${idx}-${i}`;
    const $filter = createSVGElement('filter') as SVGFilterElement; // filter

    filterMap[name]($filter, params as ParsedElement[])

    $filter.id = filterName;
    $filter.setAttribute('name', filterName);
    $def.appendChild($filter);
    return $filter.id;
  });
  mount(group, $def); // 挂载 def

  el?.setAttribute('filter', filterIds.map((filterId: any) => `url(#${filterId})`).join(' '));
  mount(group, el); // 挂载
  return el; // 返回该元素
}


// feGaussianBlur filter
export function blur($filter:any, params: ParsedElement[]) {
  const $feGaussianBlur = createSVGElement('feGaussianBlur');
  $feGaussianBlur.setAttribute('in', 'SourceGraphic');
  $feGaussianBlur.setAttribute('stdDeviation', `${params[0].value}`);
  $filter.appendChild($feGaussianBlur);
}

export function brightness($filter: SVGElement, params: ParsedElement[]) {
  const slope = convertToAbsoluteValue(params[0]);
  createFeComponentTransfer($filter, {
    type: 'linear',
    slope,
    intercept: 0,
  });
}

export function dropShadow($filter: SVGElement, params: ParsedElement[]) {
  const shadowOffsetX = params[0].value as number;
  const shadowOffsetY = params[1].value as number;
  const shadowBlur = params[2].value as number;
  // @ts-ignore
  const shadowColor = params[3].formatted as string;
  const $feGaussianBlur = createSVGElement('feGaussianBlur');
  $feGaussianBlur.setAttribute('in', 'SourceAlpha');
  $feGaussianBlur.setAttribute('stdDeviation', `${shadowBlur}`);
  $filter!.appendChild($feGaussianBlur);

  const $feOffset = createSVGElement('feOffset');
  $feOffset.setAttribute('dx', `${shadowOffsetX}`);
  $feOffset.setAttribute('dy', `${shadowOffsetY}`);
  $feOffset.setAttribute('result', 'offsetblur');
  $filter!.appendChild($feOffset);

  const $feFlood = createSVGElement('feFlood');
  $feFlood.setAttribute('flood-color', shadowColor);
  $filter!.appendChild($feFlood);

  const $feComposite = createSVGElement('feComposite');
  $feComposite.setAttribute('in2', 'offsetblur');
  $feComposite.setAttribute('operator', 'in');
  $filter!.appendChild($feComposite);

  const $feMerge = createSVGElement('feMerge');
  $filter!.appendChild($feMerge);

  const $feMergeNode1 = createSVGElement('feMergeNode');
  const $feMergeNode2 = createSVGElement('feMergeNode');
  $feMergeNode2.setAttribute('in', 'SourceGraphic');
  $feMerge!.appendChild($feMergeNode1);
  $feMerge!.appendChild($feMergeNode2);
}

export function contrast($filter: SVGElement, params: ParsedElement[]) {
  const slope = convertToAbsoluteValue(params[0]);
  createFeComponentTransfer($filter, {
    type: 'linear',
    slope,
    intercept: -(0.5 * slope) + 0.5,
  });
}

export function grayscale($filter: SVGElement, params: ParsedElement[]) {
  const amount = convertToAbsoluteValue(params[0]);
  createFeColorMatrix($filter, [
    0.2126 + 0.7874 * (1 - amount),
    0.7152 - 0.7152 * (1 - amount),
    0.0722 - 0.0722 * (1 - amount),
    0,
    0,
    0.2126 - 0.2126 * (1 - amount),
    0.7152 + 0.2848 * (1 - amount),
    0.0722 - 0.0722 * (1 - amount),
    0,
    0,
    0.2126 - 0.2126 * (1 - amount),
    0.7152 - 0.7152 * (1 - amount),
    0.0722 + 0.9278 * (1 - amount),
    0,
    0,
    0,
    0,
    0,
    1,
    0,
  ]);
}
export function sepia($filter: SVGElement, params: ParsedElement[]) {
  const amount = convertToAbsoluteValue(params[0]);
  createFeColorMatrix($filter, [
    0.393 + 0.607 * (1 - amount),
    0.769 - 0.769 * (1 - amount),
    0.189 - 0.189 * (1 - amount),
    0,
    0,
    0.349 - 0.349 * (1 - amount),
    0.686 + 0.314 * (1 - amount),
    0.168 - 0.168 * (1 - amount),
    0,
    0,
    0.272 - 0.272 * (1 - amount),
    0.534 - 0.534 * (1 - amount),
    0.131 + 0.869 * (1 - amount),
    0,
    0,
    0,
    0,
    0,
    1,
    0,
  ]);
}

export function saturate($filter: SVGElement, params: ParsedElement[]) {
  const amount = convertToAbsoluteValue(params[0]);
  const $feColorMatrix = createSVGElement('feColorMatrix');
  $feColorMatrix.setAttribute('type', 'saturate');
  $feColorMatrix.setAttribute('values', `${amount}`);
  $filter.appendChild($feColorMatrix);
}


export function hueRotate($filter: SVGElement, params: ParsedElement[]) {
  const $feColorMatrix = createSVGElement('feColorMatrix');
  $feColorMatrix.setAttribute('type', 'hueRotate');
  $feColorMatrix.setAttribute('values', `${convertAngleUnit(params[0])}`);
  $filter.appendChild($feColorMatrix);
}

export function invert($filter: SVGElement, params: ParsedElement[]) {
  const amount = convertToAbsoluteValue(params[0]);
  createFeComponentTransfer($filter, {
    type: 'table',
    tableValues: `${amount} ${1 - amount}`,
  });
}
渐变
渐变实现的话思路和滤镜差不多,不知道怎么动手的可以先自己用原生 JS 画一个效果看看,清楚了渐变效果怎么实现就好办了。也是要注意 ID 不能重复。
/* eslint-disable @typescript-eslint/no-use-before-define */
// 渐变
import { applyAttributes, createSVGElement, mount } from "./utils";
const GRADIENT_PREFIX = 'g-gradient-';
/**
* svg -> defs | shape -> linearGradient -> stop
* @param context
* @param el
* @param option
*/
export function gradient(context:any, el:any, option:any) {
const { group, node, idx } = context; // 挂载元素 svg
const $def = createSVGElement('defs') as SVGDefsElement; // defs
const gradientId = `${GRADIENT_PREFIX}${idx}`;
if (option.type === 'line') {
const $line = createSVGElement('linearGradient') as SVGLinearGradientElement; // linearGradient
option.attributes && applyAttributes($line, option.attributes); // 设置属性
$line.id = gradientId
option.stops.map((item:any) => createStops($line, item))
$def.appendChild($line);
}
if (option.type === 'radial') {
const $radial = createSVGElement('radialGradient') as SVGRadialGradientElement; // radialGradient
option.attributes && applyAttributes($radial, option.attributes); // 设置属性
$radial.id = gradientId
option.stops.map((item:any) => createStops($radial, item))
$def.appendChild($radial);
}
mount(group, $def); // 挂载 def
el?.setAttribute('fill', `url(#${gradientId})`);
mount(group, el); // 挂载
}
export function createStops($gradient: SVGLinearGradientElement | SVGRadialGradientElement, attr: any) {
const $stop = createSVGElement('stop') as SVGStopElement
applyAttributes($stop, attr); // 设置属性
$gradient.append($stop) // linearGradient -> stop
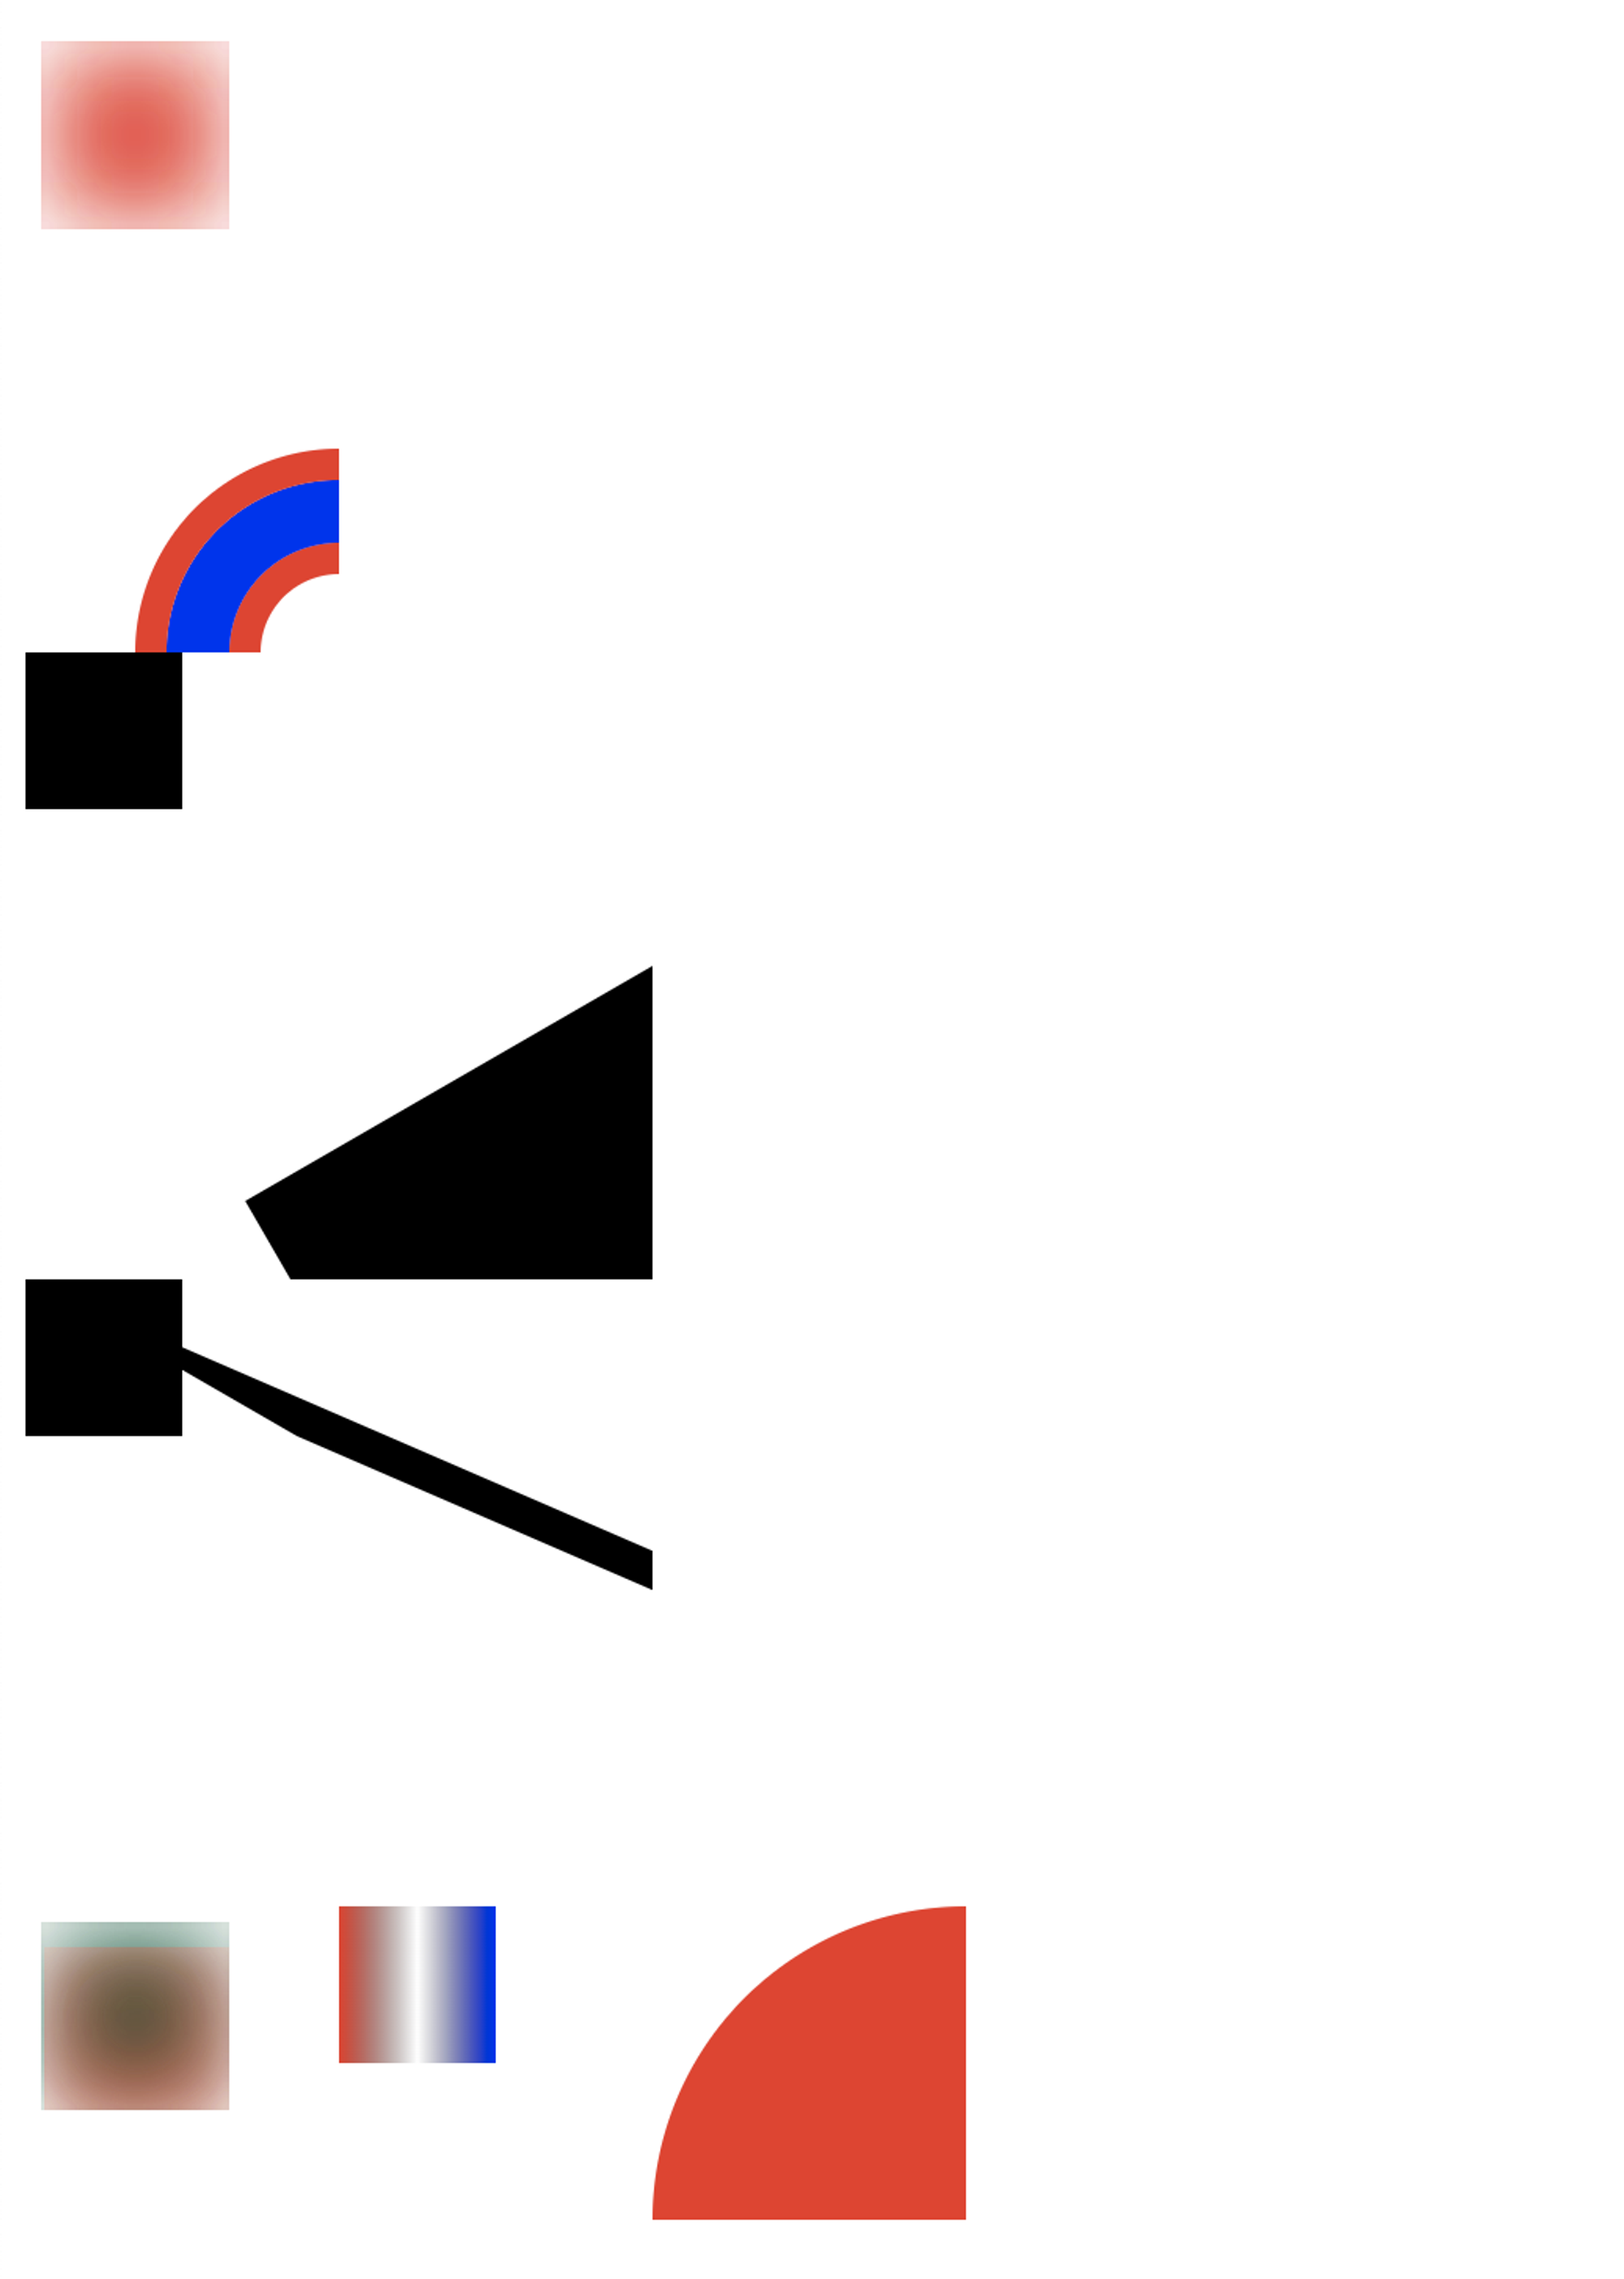
}到这里我们的迷你 SVG 渲染器就完成了,你现在可以利用它快速绘制各种图形,以及实现一些滤镜渐变效果。附一张开发时候用它绘制的图,完整源码放在 Github 上。
1、需求交付完成之后 不能继续编辑。
2、